As I posted earlier, today I made Ensaimadas (a Filipino cheese bread). Growing up, my aunt would buy my sister and me some at the local bakery (I didn't grow up in the Philippines...more like Van Nuys, the Valley equivalent). At first we were a little hesitant to try it, but once we did, we couldn't get enough. Sometimes, when I have such a fond memory from my childhood, I'm a little scared to go back and try to relive it because somethings are tastier as memories...
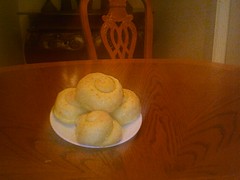
It just so happens that when I talked to my mom this morning she was talking about how she wanted to try a recipe from a cookbook our friend let us borrow. There it was, the cheese bread! (Sorry for the horrible quality picture...too lazy) I had a little bit of confidence since yesterday at Bakery Class we made baguettes and I had delt with yeast and kneading and all that stuff you need for a great bread.
Don't let the time period it takes scare you. It may take a few hours to make this, but the waiting periods are enough time to get some laundry done, watch some television or even take a short nap! Just don't forget to put the alarm on!
Ingredients:
1 cup lukewarm water
2 tsp. dry yeast
2 cups all purpose flour (have some extra handy)
8 egg yollks
1/4 lb. butter (I used unsalted, but you may want to try regular salted, let me know your results!)
1/2 tsp. salt
Canola or Vegetable Oil
SOFT or melted Butter (use regular salted butter or margarine)
1 can of cheese (you can find this at pretty much any ethnic food market, it'll be in a blue can probably in or near the refrigerators and it's manufactured by Kraft. I haven't tried it yet, but you might be able to substitute this for another kind of cheese)
4 Tbsp. Granulated Sugar
Equipment Needed:
Large Bowl
Whisk or some tool to mix with
(Above can be substituted with a Vertical Electric Mixer)
Clean counter top surface or Cutting Board
Large clean plastic bag or some clear saran wrap
Baking Sheet Pans lined with Parchment Paper (No need to grease them!)
Knife
Rolling Pin
Cheese Grater or Knife
Pastry brush or something to apply melted butter to the bread
Procedure:
1) Measure and prepare all ingredients (trust me, it's a lot easier this way!)
2) In the large bowl, pour the lukewarm water in and mix the dry yeast into it. Let it set for 15 to 20 minutes.
3) Then add the flour and mix well.
4) After, mix in the eggs, butter, and salt. The dough will resemble some kind of weird hybrid of a dough and a batter. Don't be alarmed!
5) On a very well floured surface (and I mean well floured, it's the only way it'll begin to look like a dough) oil your hands slightly (I tried flour, but now that I look back, oiling your hands would probably be better) and knead the dough. You may add flour to it just until it can be handled well.
6) Pat it with some oil (this will prevent it from forming a crust and drying out) and let it stand on the table for 30 minutes covered with a plastic bag or saran wrap.
7) Then cut the dough into about 24 small rounded pieces and leave them to double their size (it took me about 45 minutes.) I was worried that the house was a little too cold, so I stuck them in the oven while it was off for the time it took them to expand. You might want to again, pat it with a little oil because mine for a bit of a crust..nothing major, but it was still there.
8) When they have expanded, on a buttered surface, roll the balls out until they are thin (aim for about 1/8" or thinner if you can)
9) You can use a pastry brush or your fingers (I used the later) and spread it on the dough, then sprinkle some of the cheese on there.
10) Then roll it up lengthwise so it looks like a snake and coil it (kind of like a cinnamon bun!)
11) Let it rise for another hour
12) During this time, you can preheat your oven to 450 degrees fahrenheit
13) When it is done rising, bake them for about 10-15 minutes or until it is a golden brown.
14) Let the bread cool
15) When it is cool, brush some melted butter and sprinkle the sugar to the tops of the bread. (I was worried the bread was going to be dry, so I poked some holes with a skewer on the top to let the bread soak up the butter.)
The time it takes is a bit intimidating, but once you do it, you'll find that it's a lot easier than it looks. But the people that try it won't have to know! It's easy and delicious. As always, send me your results or some recipes that you want to share with me to succeedingmartha@gmail.com.
Subscribe to:
Post Comments (Atom)


2 comments:
CHEESE BREAD?!?!?!?!? MMMMM yum!
I've been cooking lately, so I definitely want to try this out!!!
Mmmm! Cheese bread!!!! Horray for Jane!
COOL!!! i didnt know you can make ensaimadas!!! they look awesome in the picture!!! im so hungry now!!! but even though its really chesse bread it still looks good!!! i want to try on so badly..:(
Post a Comment